Water Heater Installation Tips for Huntington Beach & La Mirada Homes
For residents looking into Water Heater Installation in Huntington Beach, CA it’s important to plan carefully. This guide explains how to select and size the right water heater, navigate local permit requirements, and implement safety features. You’ll learn about different heater types, code compliance, installation steps, costs, and maintenance so you can make informed decisions for your home.
Water Heater Types and Selection
Water heaters come in various types with different costs, efficiencies, and space needs.
- Traditional storage tank: A cylindrical tank (typically 30–80 gal) that stores hot water. These are relatively inexpensive upfront ($500–$1,500) and last about 8–12 years. However, they use energy continuously to keep water hot (standby loss).
- Tankless (on-demand): Compact units heat water as it flows. They cost more to buy and install (around $1,500–$4,000) but can last ~20 years and avoid standby heat loss. Tankless heaters are ~24–34% more efficient than standard tanks.
- Heat pump (hybrid) heaters: These extract heat from the surrounding air and transfer it to water. They cost about $1,200–$3,000 and need sufficient air space (e.g., garage or basement). They deliver 2–3× the efficiency of conventional electric heaters (ideal for warm California climates).
- Solar water heaters: These use solar collectors to preheat water, covering roughly 50–80% of hot water needs in sunny areas. They have a high upfront cost ($3,000–$6,000) but a very long life (20+ years) and a low operating cost.
Also consider fuel type: natural gas units run cheaper in California (gas is ~30–50% less per BTU than electricity), but require flue venting. Electric units (including heat pump models) avoid combustion and vent requirements. Heat pump models can actually cost less to operate than gas units due to their high efficiency. In short, gas tanks are common in these areas for lower fuel cost, while electric (heat pump) models save energy long-term.
Sizing and Capacity
Choosing the correct size heater prevents running out of hot water or wasting energy.
- Storage tank size (FHR): Look at the “first-hour rating” (FHR) for tank heaters, which indicates how much hot water the unit can supply during one busy hour. Estimate your peak usage (sum shower, laundry, dishwasher needs). For example, a family of four typically needs an FHR of around 60–70 gallons. Pick a tank with an FHR slightly above that number to ensure comfort.
- Tankless flow rate: Tankless heaters are sized by flow rate (gallons per minute, GPM). Calculate total simultaneous demand: e.g., a shower (~2.5 GPM) + a kitchen sink (~1.5 GPM) + a dishwasher (~1.5 GPM) = ~5.5 GPM. Then choose a tankless rated about 20% higher (in this example, ~6–7 GPM) to maintain pressure.
- Household usage: Match the heater to your home’s usage pattern. Smaller homes (1–2 people) often need 30–40 gal tanks or 6–8 GPM tankless units. Larger families (5+ people) may require 50–80-gal tanks or higher-flow tankless units. Sizing too small leads to cold spells; oversized units cost more than necessary.
Proper sizing means you get reliable hot water without extra energy waste. In practice, review hot-water habits (especially morning showers) and use manufacturer sizing guides or a professional calculator to pick the right capacity. This avoids both hot-water shortages and unnecessary costs.
Permits and Local Regulations
Installing or replacing a water heater in California generally requires permits and adherence to state/local building codes.
- Permit requirement: Most jurisdictions (including Huntington Beach and La Mirada) mandate a building/plumbing permit for any new water heater or replacement. You must obtain the permit before work starts and schedule an inspection after installation. Doing work without a permit can lead to fines and unsafe installations.
- California Plumbing Code: State regulations specify required safety components. For example, any closed water system (with a pressure regulator or backflow device) must include a thermal expansion tank to absorb extra pressure. An approved temperature/pressure (T&P) relief valve is also mandatory on all tank heaters.
- Seismic strapping: In California’s earthquake zones, water heaters must be anchored with steel straps (usually one near the top and one near the bottom) to prevent tipping. Missing or improper strapping is a common code violation that risks tank rupture in a quake.
- Drain pan and drain line: If a heater is installed where leaks could cause damage (e.g., an attic or second floor), codes require a corrosion-resistant pan under the tank with a drain line to a safe discharge point. This pan won’t stop leaks but will channel leaking water away to minimize flooding.
- Gas venting: Gas heaters must vent exhaust outdoors via an approved metal vent with the correct upward slope and clearances. Venting errors can cause back-drafting and carbon monoxide issues.
- Electric requirements: Electric units need a dedicated circuit and proper wiring. If upgrading to an electric tankless heater, your electrical panel may need an upgrade (e.g, to 200 amps) to supply the high amperage.
Water Heater Installation in La Mirada, CA, follows these same rules. For example, installing or replacing a water heater in La Mirada requires obtaining a plumbing permit and including all mandated safety features (straps, expansion tank, T&P valve, etc.). Always verify local amendments (e.g., specific noise or setback rules) with your city or county building department.
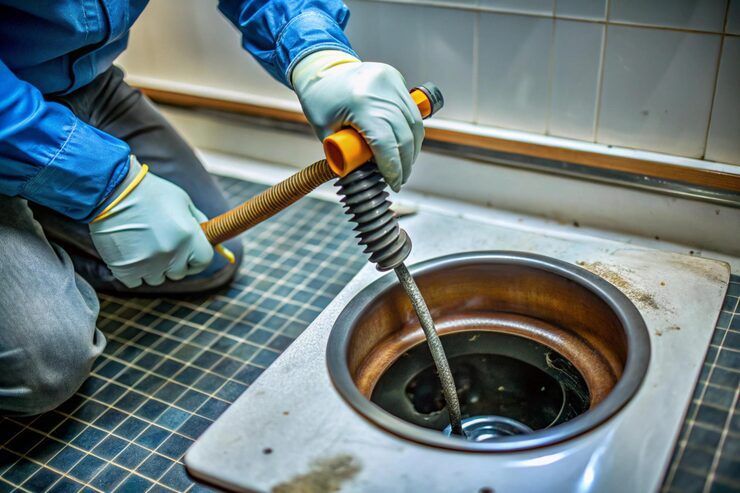
Installation Site Preparation and Safety Precautions
Preparing the space and following safety steps prevents future problems.
- Clearances: Leave space around the heater for service. Tank heaters generally need ~6 inches of clearance on all sides for access. Also, ensure ceiling height is sufficient (often an 8-foot ceiling for a 50-gal tank).
- Location: Ideally, place the unit centrally or close to plumbing lines to reduce heat loss in pipes. Central placement can keep hot water delivery faster. Crucially, the unit must be accessible for maintenance (no tight corners). Avoid locations with combustible storage or poor ventilation.
- Venting and combustion air: For gas heaters, install the vent pipe per code: it should slope at least 1/4″ per foot and exhaust above the roof/soffit upward. Keep required clearances from combustibles. Provide adequate combustion air – if in a confined space or closet, add vents or grills to avoid oxygen starvation. Improper venting or airflow can cause carbon monoxide accumulation.
- Garage installations: If the heater is in a garage, it must be mounted on a raised platform (about 18″ above the floor) to keep ignition sources above vehicle fumes. The pilot and burner must be at least 18″ above the garage floor.
- Drain pan: When the unit is above ground level, place a drain pan under it with a nearby floor drain or hose spigot. This protects floors from leaks. Confirm the pan’s drain line is properly installed to carry water away.
- Seismic strapping: Securely strap the heater to wall studs with strong metal bands. One strap is usually placed at the top third of the tank and another at the bottom third to resist tipping. Check that straps are snug against the tank.
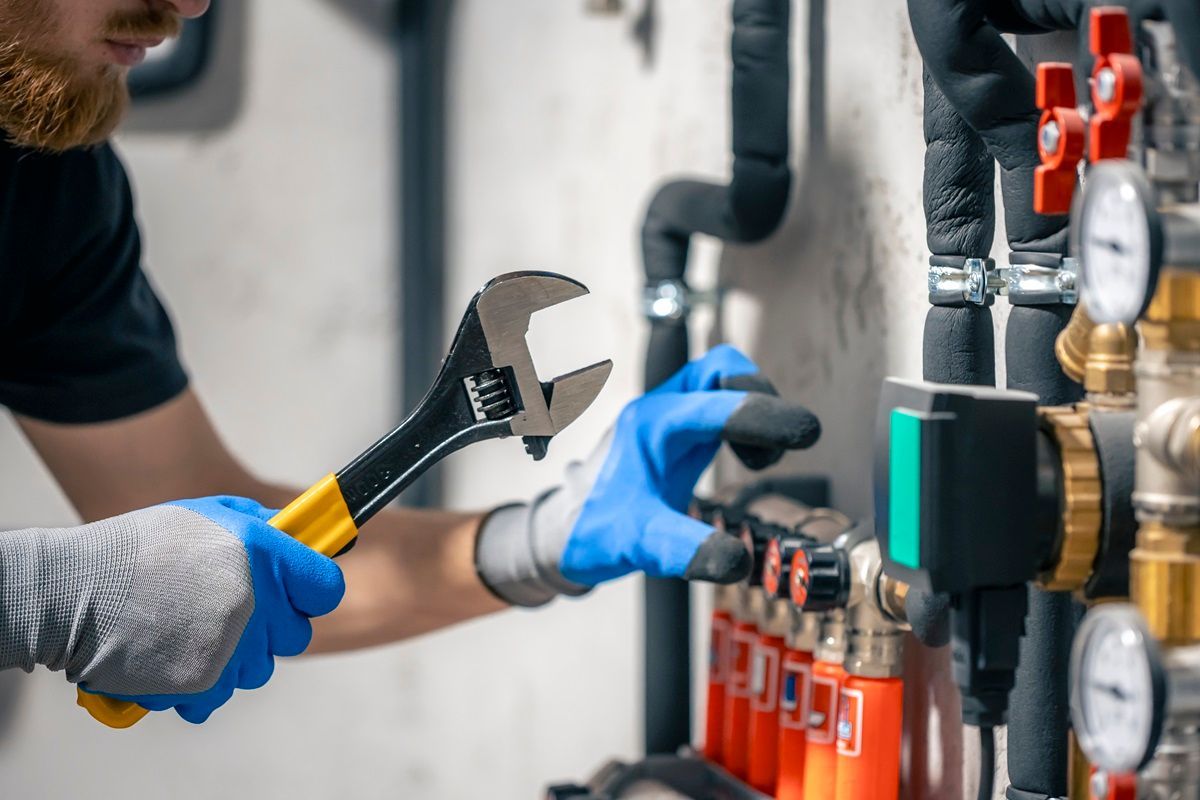
- Plumbing connections: Use the correct fittings. Avoid joining incompatible metals (e.g., copper pipe to galvanized steel) directly, as this can cause galvanic corrosion and leaks. Instead, use dielectric unions or approved connectors between dissimilar pipes. Use flexible connectors or braided stainless gas lines to ease movement.
- Electrical connections: For electric heaters, ensure the circuit matches the appliance's amperage. Run proper gauge wires to the water heater’s junction box. If the new unit is much larger or tankless, you may need to upgrade your service panel to supply the higher amperage.
- Testing safety devices: Plan for installing or checking the T&P relief valve (it should discharge to within 6″ of the floor). Also check any emergency gas shutoff valves (flexible hose or seismic gas shutoff valve).
These precautions integrate code requirements and practical safety. For example, forgetting to elevate a garage unit or neglecting vent clearance can be dangerous. Taking the time to prepare the location and install all safety components correctly will result in a secure and code-compliant system.
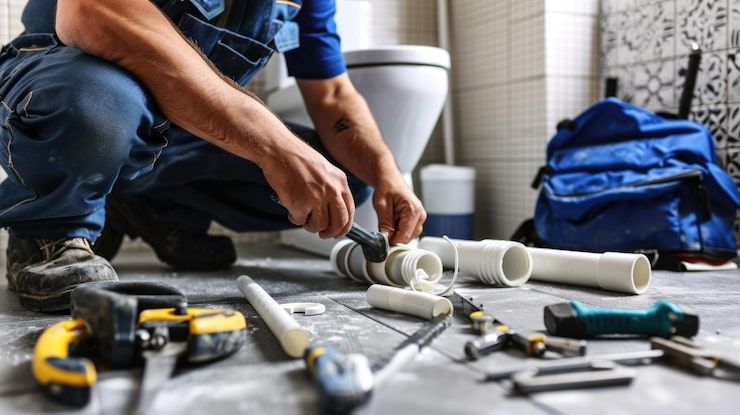
Installation Process Overview
Water heater installation typically follows a series of steps to replace the old unit with the new one safely.
- Shut off utilities: Turn off the water supply (usually at a shut-off valve above the heater) and cut power to the heater (flip the breaker or close the gas valve).
- Drain the old heater: Connect a hose to the tank’s drain valve and open it (with a hot water faucet open upstairs to vent). Drain all water from the old unit to avoid spills or burns.
- Disconnect and remove: Detach the gas line (capping it if needed) or disconnect the electrical wiring. Remove any flue vent pipe from the chimney. Take out the old heater carefully.
- Set the new heater: Place the new unit in position, ensuring it fits the space. For a gas heater, line up its flue collar with the vent; for an electric model, ensure the electrical conduit is accessible. Secure the tank with seismic straps.
- Install safety components: Attach a new or existing T&P relief valve (most tanks come with one). Run a discharge tube from it to the floor or a drain. Put a pan under the tank if required. Install a thermal expansion tank on the cold inlet if your system needs one.
- Connect water lines: Use the appropriate fittings for your pipes (copper, CPVC, PEX, etc.). Avoid incompatible metal joins. Refill the system slowly: open a hot faucet downstairs and slowly open the cold inlet to fill the new tank, letting air escape. Be sure to fill to prevent a “dry fire.”
- Connect fuel and power: For gas heaters, attach a flexible gas connector to the tank’s inlet and install a gas shutoff valve within reach. For electric heaters, connect the supply wires to the junction box (or directly to the heating element) on a dedicated circuit. Verify that the breaker size matches the heater’s requirements.
- Purge air and test: Once water fills the tank, keep a hot faucet open to bleed out air. Close it when the flow is steady. Then restore power or light the pilot. Check all connections for leaks (water or gas). Test the T&P valve briefly to ensure it operates.
- Inspection: If you pulled a permit, schedule the final inspection. An inspector will verify proper installation of straps, valves, venting, etc. Once the permit is passed, the permit process is closed.
Following each step carefully helps avoid errors. For example, failing to fill the tank before firing it (‘dry firing’) can burn out the heater element or damage the tank. Always refer to the manufacturer’s instructions and code requirements. Skipping a step or shortcutting the process often leads to leaks, code violations, or unsafe operation.
Cost and Timeline Considerations
Installing a water heater involves equipment costs, labor, and time.
- Equipment cost: Basic water heaters range from about $600 to $2,700, depending on type and size. A simple gas or electric tank usually falls near the lower end of that range. Tankless, solar, or ultra-high-efficiency models often start above $1,500 and can reach $4,000 or more.
- Labor cost: Professional installation is typically half of the total project cost. Expect roughly $150–$450 in labor for replacing a tank heater, and $600–$1,900 for installing a tankless unit. These ranges account for 1–3 hours of skilled plumbing work under normal conditions.
- Additional materials: Factor in items like an expansion tank ($90–$350), updated electrical wiring, or a new gas line ($260–$820) if changing fuel types or locations. Adding a floor drain pan or seismic gas shutoff valve also increases cost slightly.
- Permits and inspections: Permit fees can range from $25 to $300 or more, depending on your city and job complexity. Typical turnaround for permit approval is same-day for a straight swap (same location) or up to a few days for relocations. Don’t forget the time needed to schedule a licensed plumber and inspector.
- Timeline: A straightforward replacement usually takes 2–4 hours for a qualified plumber. The hot water will typically be restored within an hour after startup (e.g., a 50-gal tank reheats in 45–90 minutes). If the job involves moving the heater to a new spot, upgrading the vent, or correcting old code violations, expect it to take additional hours or even multiple days.
- Unforeseen costs: Older installations may hide issues. For example, rusty pipes might need repair, or concealed connections may require drywall work ($1–$3 per sq ft). Always budget extra for surprises.
Realistic planning is important. Underestimating time or price can lead to rushed work or inadequate installation. It’s usually wiser to allow a bit more budget and time upfront; cutting corners (e.g., skipping an expansion tank or rushing the vent work) often means higher costs later. Consult local plumbers for estimates based on your specific circumstances.
Maintenance and Long-Term Care
Regular maintenance keeps your water heater running efficiently for years.
- Flush the tank: Drain and flush sediment from a storage tank at least once a year (every 6 months in very hard water areas). Sediment buildup reduces heating efficiency and can cause rumbling noises or premature wear. A proper flush restores efficiency and extends tank life.
- Test the relief valve: Lift the lever on the T&P relief valve annually to ensure it flows freely and reseats properly. This prevents pressure from building up to dangerous levels inside the tank. Check that the discharge tube is unobstructed.
- Check anode rod: Inspect the sacrificial anode rod (often available on tank heaters) every 1–3 years. Replace it if it’s heavily corroded. The anode rod helps prevent rust inside the tank; a worn-out rod can lead to tank corrosion and leaks.
- Monitor venting (gas heaters): Annually inspect the exhaust venting for blockages or corrosion. Ensure vent pipes and caps are intact and clear of debris. Proper venting prevents carbon monoxide buildup. Also, test carbon monoxide detectors in your home to ensure they work.
- Keep settings moderate: Maintain the thermostat at around 120 °F (49 °C). This setting provides hot water without excessive energy use and minimizes scalding risk. Very high temperatures accelerate scale buildup.
- Inspect for leaks or rust: Look under and around the heater regularly. Even small leaks at fittings or a rusty tank signal that the unit may be failing and should be serviced or replaced.
Routine care significantly improves longevity. In Huntington Beach and La Mirada, the local climate (humidity, salt air) and water quality (hardness) can affect heater durability. Homeowners should keep an eye on their units, especially older tanks, and replace them once they near the end of their expected life (~10–15 years for tanks, up to 20 for tankless) to avoid sudden failures.
Conclusion
Properly installing a water heater in Huntington Beach or La Mirada means balancing the right equipment choice with code compliance and safety. By understanding system types, sizing needs, local regulations, and maintenance practices, homeowners can ensure their hot water system is reliable and efficient. MHT Plumbing emphasizes thorough planning and adherence to California standards so that your water heater installation is safe, cost-effective, and long-lasting.
FAQs
How do I determine the right size water heater for my home?
Calculate your home’s peak hot-water use and match it to the heater’s capacity. For tank heaters, use the first-hour rating (FHR): add up typical morning usage (showers, appliances) and pick an FHR above that total (e.g., ~60–70 gallons for a 4-person family). For tankless, add up simultaneous flow rates (e.g,. shower GPM) and choose a unit rated about 20% higher. This ensures you don’t run out of hot water or overspend.
Are permits required to install a new water heater in California?
Yes. Most California cities, including Huntington Beach and nearby areas, require a permit for any water heater installation or replacement. After installation, you must pass an inspection to confirm the work meets plumbing and safety codes (straps, valves, etc.). Permits protect homeowners by enforcing code compliance.
What’s the advantage of a tankless water heater over a tank model?
Tankless (on-demand) heaters heat water only when needed, so they eliminate standby heat loss. They typically last longer (up to ~20 years) and can supply continuous hot water (as long as demand doesn’t exceed their flow rate). The trade-off is a higher upfront cost and potentially needed upgrades (larger gas line or electrical panel). Traditional tanks are cheaper upfront, but waste some energy keeping water hot.
You might also like
Blog